
Getting Started
Step 1: Create an app
The first step is to retrieve a key (client Id) and secret (client secret). These credentials identify your app during the authorization process. Create an app to get the credentials.
Step 2: Ask for permission
Before your app can access any data, a user must grant permission to the app. While developing your app, you'll figure out a minimum list of scopes that your app requires to work. When a user initiates the request to connect Deel with your app, you'll request those same scopes.
To ask for scopes, redirect the user to https://app.deel.com/oauth2/authorize
Sandbox
When using the sandbox, use https://demo.deel.com as the host URL for OAuth.
The full redirect URL looks something like this:
https://app.deel.com/oauth2/authorize?client_id=1c2ccb6b-avds-47c1-a6n1-dfd29kh8dye4&redirect_uri=https%3A%2F%2Fexample.com%2Fredirect&scope=contracts%3Aread%20contracts%3Awrite%20organizations%3Aread&response_type=code&state=fp1eh3jkly
| Query parameter | Description |
|---|---|
| client_id | Client id for the app. |
| redirect_uri | The URL to which the user is redirected after authorizing the app. The complete URL specified here must match the redirect URI provided in step 1. |
| scope | Encoded space-separated list of scopes. For example, to create contracts and read contracts use scope=contracts%3Aread%20contracts%3Awrite. |
| response_type | Expected response type. Always use response_type=code. |
| state | A randomly selected value provided by your app is unique for each authorization request. During the OAuth2 callback, your app must check that this value matches the one you provided during authorization. This mechanism is important for the security of your app. |
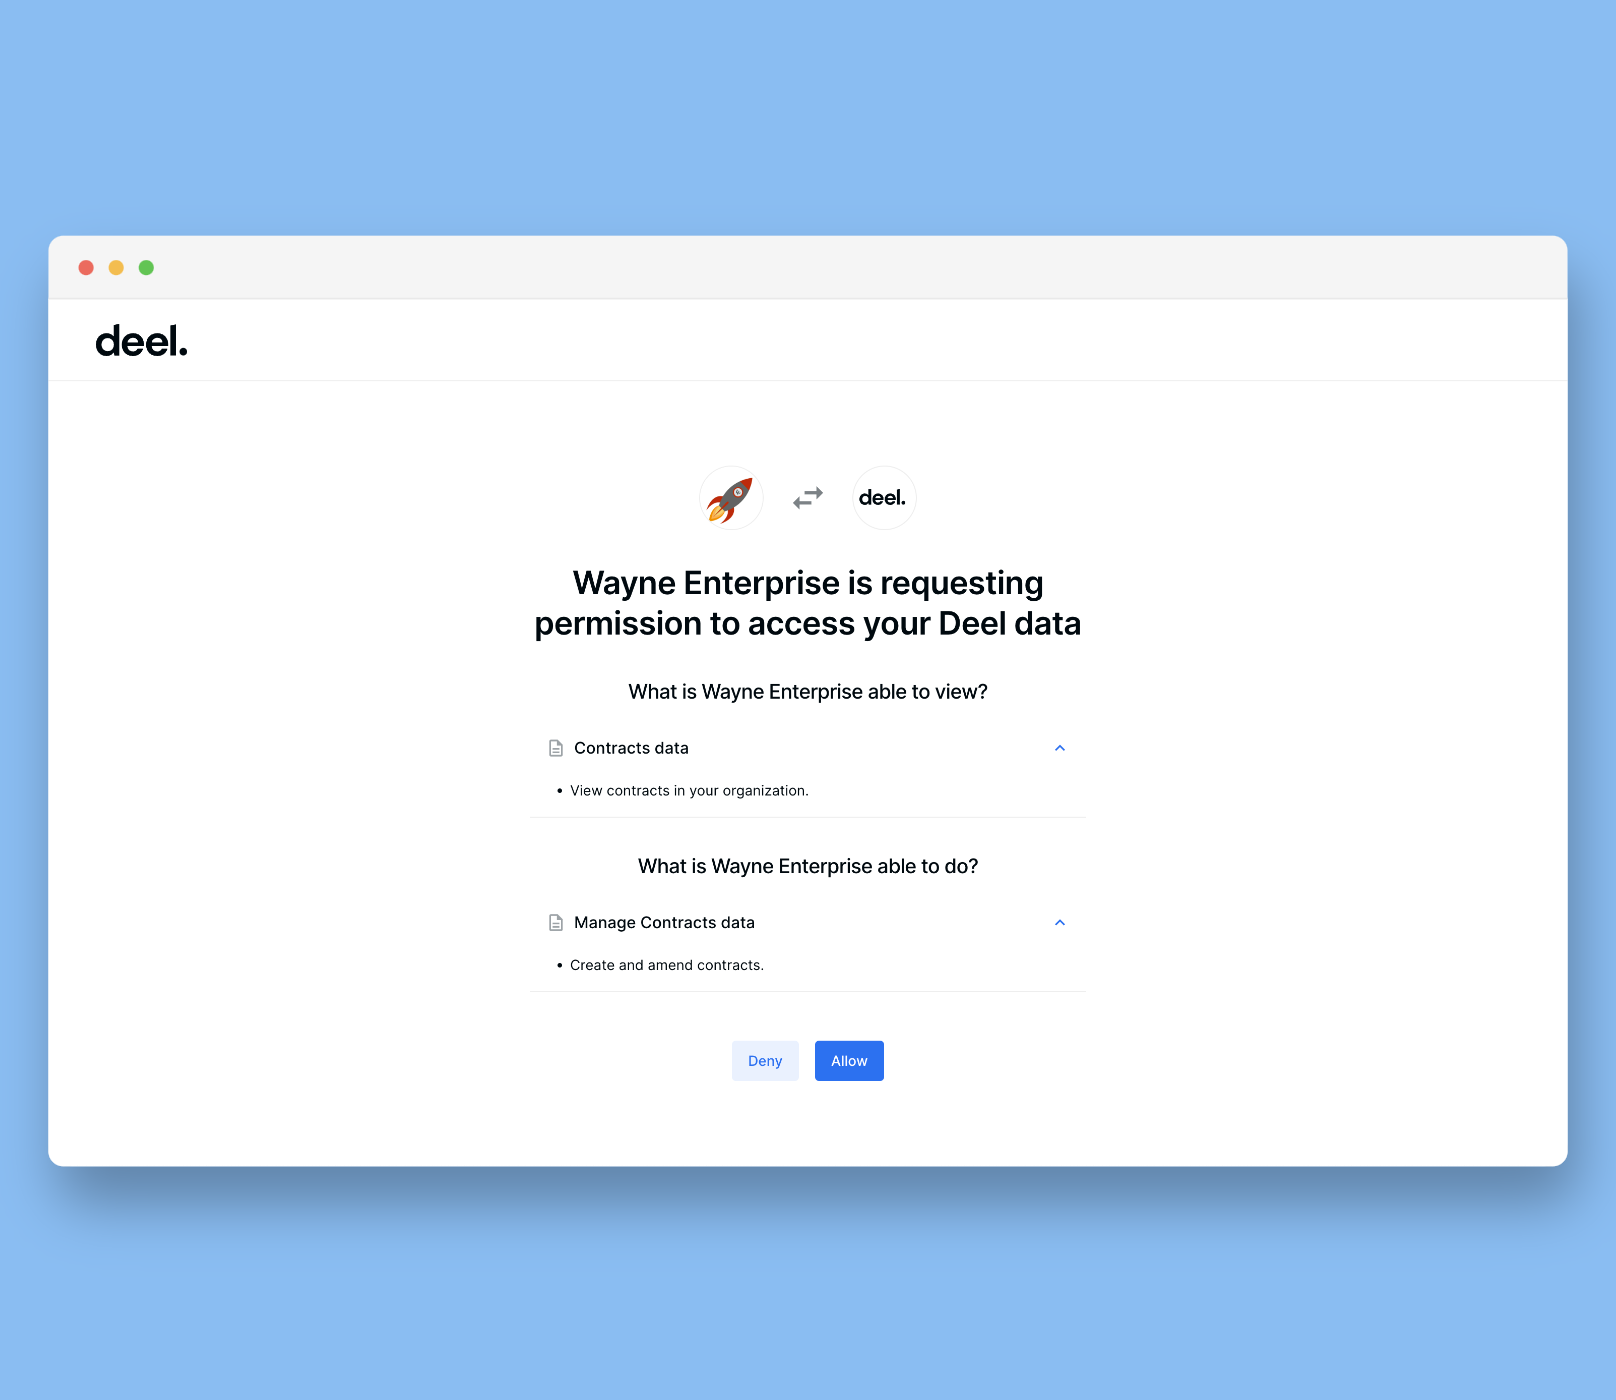
When the user arrives at the URL, Deel shows the following prompt to receive authorization from the user:
Step 3: Confirm permission
Once the user allows your app to access the requested scopes, they are redirected to your app’s server. The authorization_code is passed in the confirmation redirect.
https://example.com/redirect?code={authorization_code}&state={state}
Security check
Before you continue, make sure that your app performs the security check to verify the state parameter which will have the same value that your app provided to Deel during step 2.
Step 4: Get an access token
When the security check passes, then you can exchange the authorization code for an access token (with a longer validity period) by sending a request to Deel:
POST 'https://app.deel.com/oauth2/tokens' \
--header 'Authorization: Basic d3dzZm5lbG84MDowYWZzN3h2MGQ5' \
--header 'Content-Type: application/x-www-form-urlencoded' \
--data-urlencode 'grant_type=authorization_code' \
--data-urlencode 'code={authorization_code}' \
--data-urlencode 'redirect_uri={redirectUri}'
When using the sandbox, use https://demo.deel.com as the host URL for token exchange.
Request Body
Please use the following parameters in the request body:
| Parameter | Description |
|---|---|
| grant_type | Identification of the grant type. Please use grant_type=authorization_code. |
| code | The authorization code your app received in step 3. |
| redirect_uri | The URL to which the user is redirected after authorizing the app. The complete URL specified here must match the redirect URI provided in Step 1. |
Authorization
Please use the Basic authentication method to authenticate this request.
The Authorization header follows this format:
Authorization: Basic <credentials>
Then construct the credentials like this:
- The app’s client_id and client_secret are combined with a colon.
- The resulting string is base64 encoded.
So if your app’s client_id and client_secret are wwsfnelo80 and 0afs7xv0d9, the combination is wwsfnelo80:0afs7xv0d9, and when base64 is encoded, this becomes d3dzZm5lbG84MDowYWZzN3h2MGQ5. So request would be sent with the following header:
Authorization: Basic d3dzZm5lbG84MDowYWZzN3h2MGQ5
Response
The server responds with an access token:
{
    "access_token": "MTQ0NjJkZmQ5OTM2NDE1ZTZjNGZmZjI3",
    "expires_in": 2592000,
    "refresh_token": "IwOGYzYTlmM2YxOTQ5MGE3YmNmMDFkNTVk",
    "token_type": "Bearer",
    "scope": "contracts:read contracts:write"
}
| Parameter | Description |
|---|---|
| access_token | The access token that can be used to authenticate requests to Deel API. |
| expires_in | The number of seconds this token is valid for after being generated. |
| refresh_token | A refresh token can be used to rotate the access token when expired. |
| token_type | Deel access tokens are Bearer tokens. |
| scope | List of scopes this token grants access to. |
Step 5: Make authenticated requests
After your app has obtained an API access token, it can make authenticated requests to the Deel API. These requests are accompanied by these headers: Authorization: Bearer {access_token} and x-client-id: {client_id} where {access_token} is replaced with the access token retrieved in step 4 and {client_id} is replaced with the client_id retrieved in step 1.
The following example shows how to retrieve a list of contracts using the Deel API.
Sandbox
When using the sandbox, use
https://api-sandbox.demo.deel.comas the URL for API calls.
curl -X GET 'https://api.letsdeel.com/rest/v2/contracts' \
--header 'Authorization: Bearer MTQ0NjJkZmQ5OTM2NDE1ZTZjNGZmZjI3'
--header 'x-client-id: {client_id}'
Token validity
The OAuth2 access token is valid for 2592000 seconds (30 days) after generation. Refresh tokens are valid for 7776000 seconds (90 days) after being generated.
Updated 8 months ago